
How to take a passport photo with your phone
The photo you upload decides 90% of the result. You don't need a studio — you need even light, a plain wall and two metres of distance. This guide takes about two minutes to read and fixes the mistakes that get photos rejected.
Create my ID photoThree rules that matter most
- Face the camera straight on, head level, both shoulders in frame.
- Light your face from the front — stand facing a window. Never shoot with a window behind you.
- Use the rear camera, stand 1.5–2 m away, and ask someone to take the photo for you.
Step by step, with a phone
Follow these in order — most rejected photos fail at step 2 or 4.
- 1
Find a plain wall
A white or light grey wall is ideal. Stand about 50 cm away from it so your shadow doesn't fall on the wall behind you.
- 2
Face the light
Stand facing a window during the day — soft, even daylight is the best light there is. At night, use two lamps at 45° to your left and right. Never let the light come from behind you or straight down from a ceiling light.
- 3
Use the rear camera
The front selfie camera has a lower resolution and a wide lens that makes the nose and forehead look bigger. The rear camera gives sharper, more accurate results.
- 4
Get 1.5–2 m away
Ask someone to hold the phone, or prop it up and use the 3-second timer. If you can, use 2× zoom instead of walking closer — closer distances distort the face.
- 5
Hold it at eye level
The lens should be at the same height as your eyes, pointing straight ahead. Shooting from above or below changes the shape of the face.
- 6
Turn the extras off
Switch off beauty mode, filters, portrait blur and the flash. HDR is fine. Do not edit the photo afterwards — retouching makes it non-compliant in most countries.
- 7
Take 5–10 shots
Then pick the one where your eyes are sharpest and your hair is not covering your eyebrows or ears. A neutral expression with your mouth closed is required for almost every document.
Lighting: the single biggest factor
Same person, same phone — only the light changed.

Facing a window: even light, no shadows, natural skin tone.
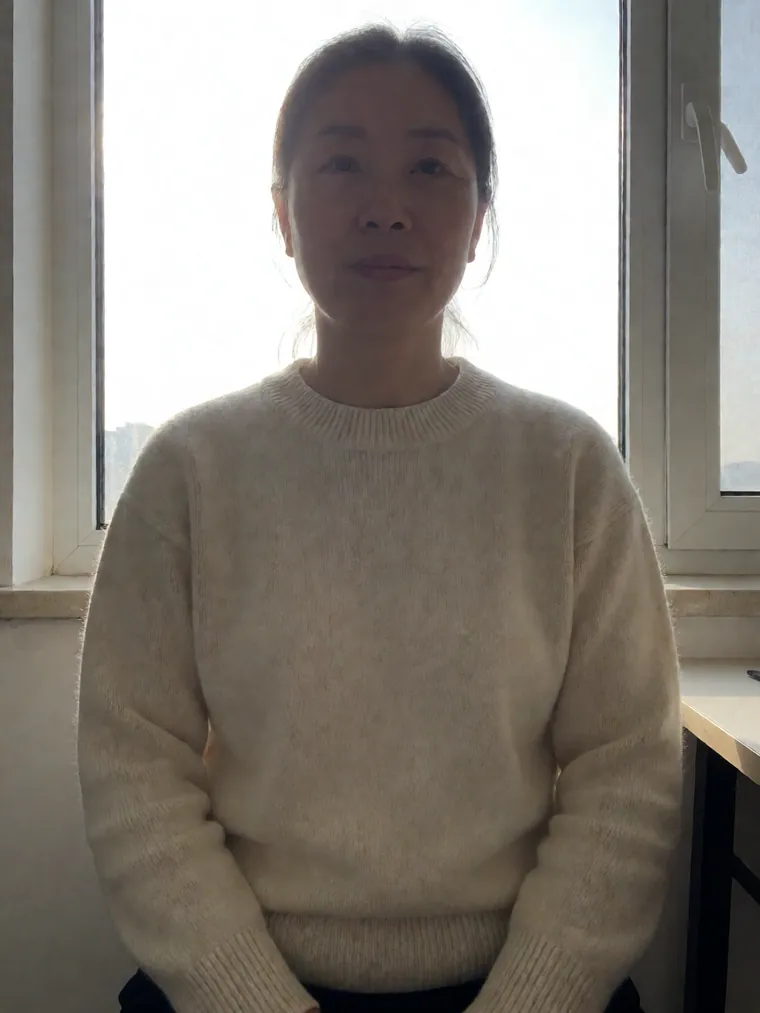
Window behind you: the face goes dark and underexposed.
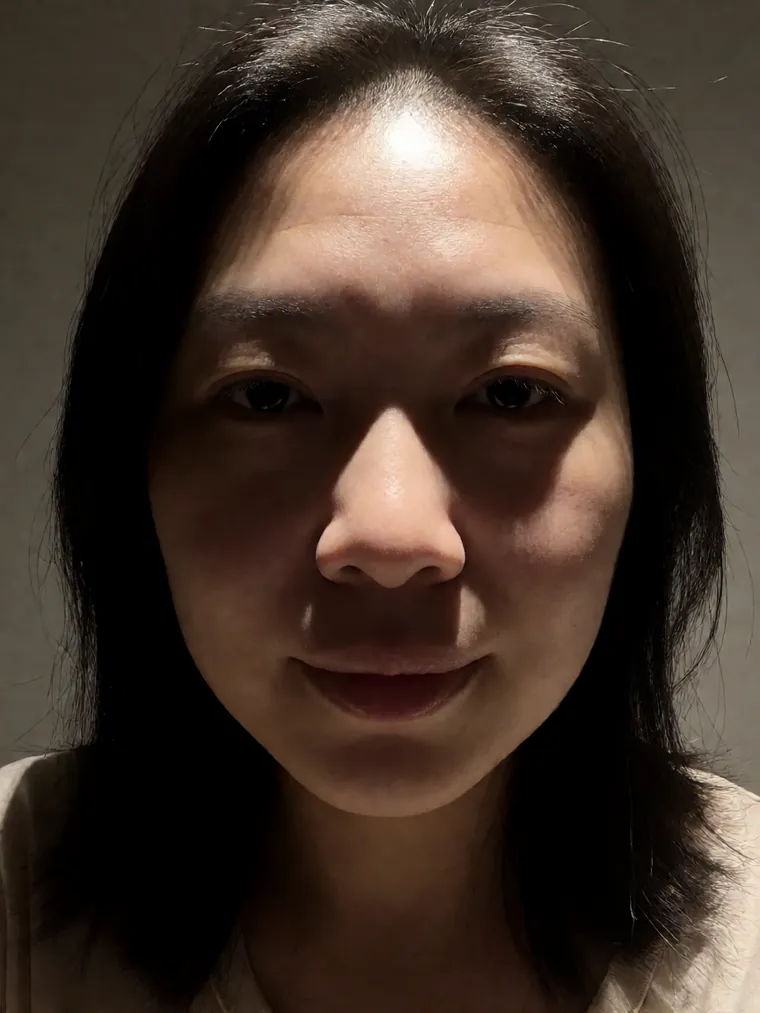
Ceiling light above: dark shadows in the eye sockets and under the nose.
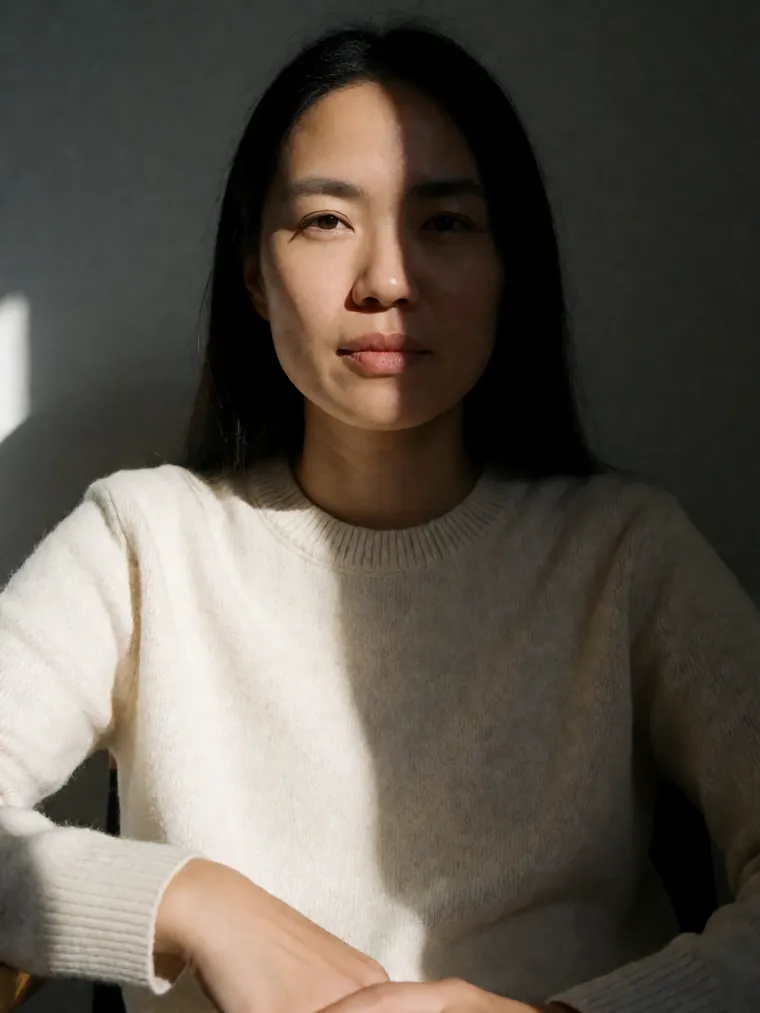
Strong light from one side: half of the face disappears into shadow.
Distance and framing
The face must fill the frame the same way it would in a photo booth.
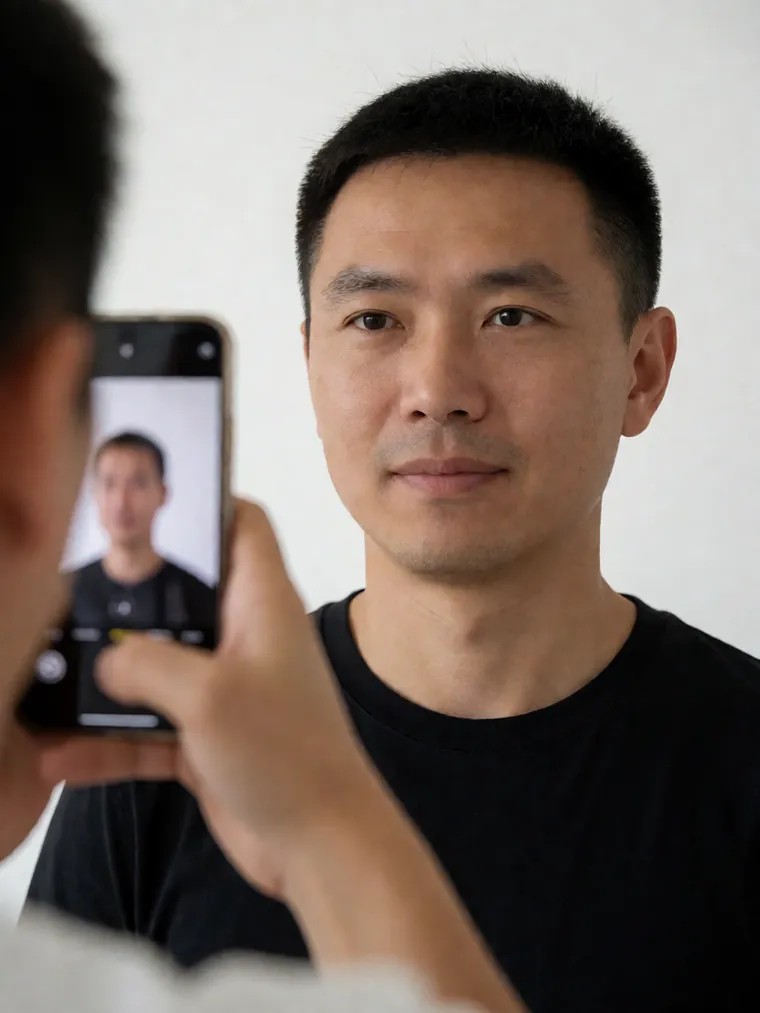
Someone else shoots from about two metres: correct head size, no distortion.
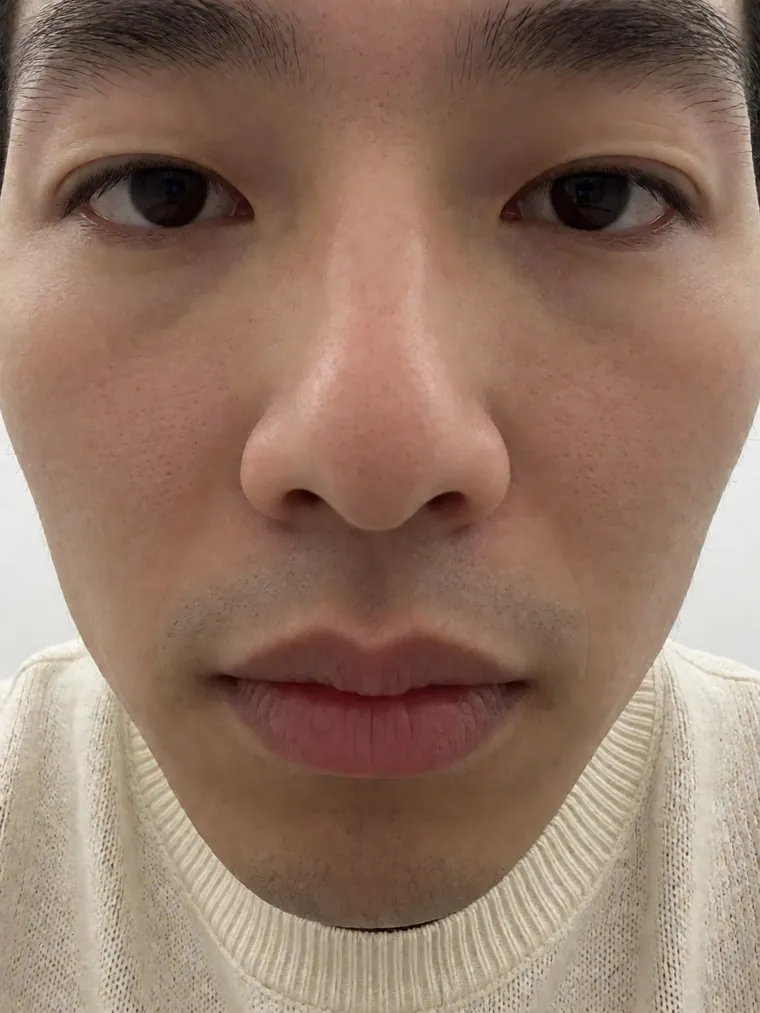
Arm's-length selfie: the wide lens bloats the nose and forehead.
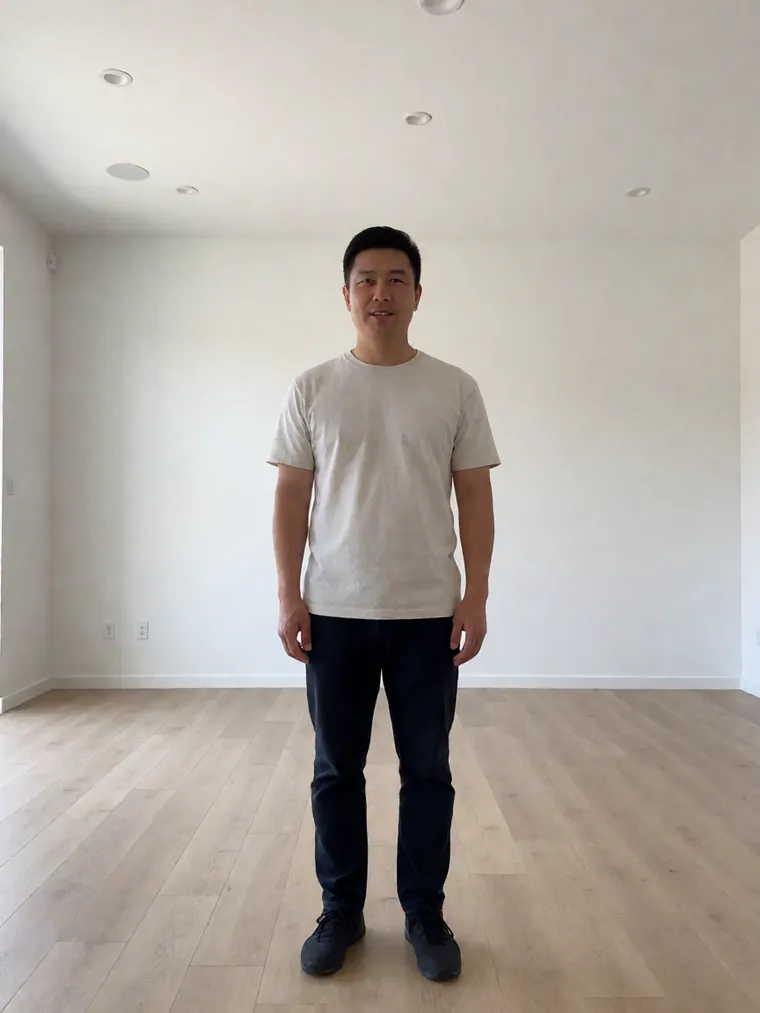
Too far away: the face is far smaller than the document requires.
Do not do any of this

No hats, no sunglasses, no tinted lenses. Remove ordinary glasses if you can — glare and frames covering the eyes are common reasons for rejection.
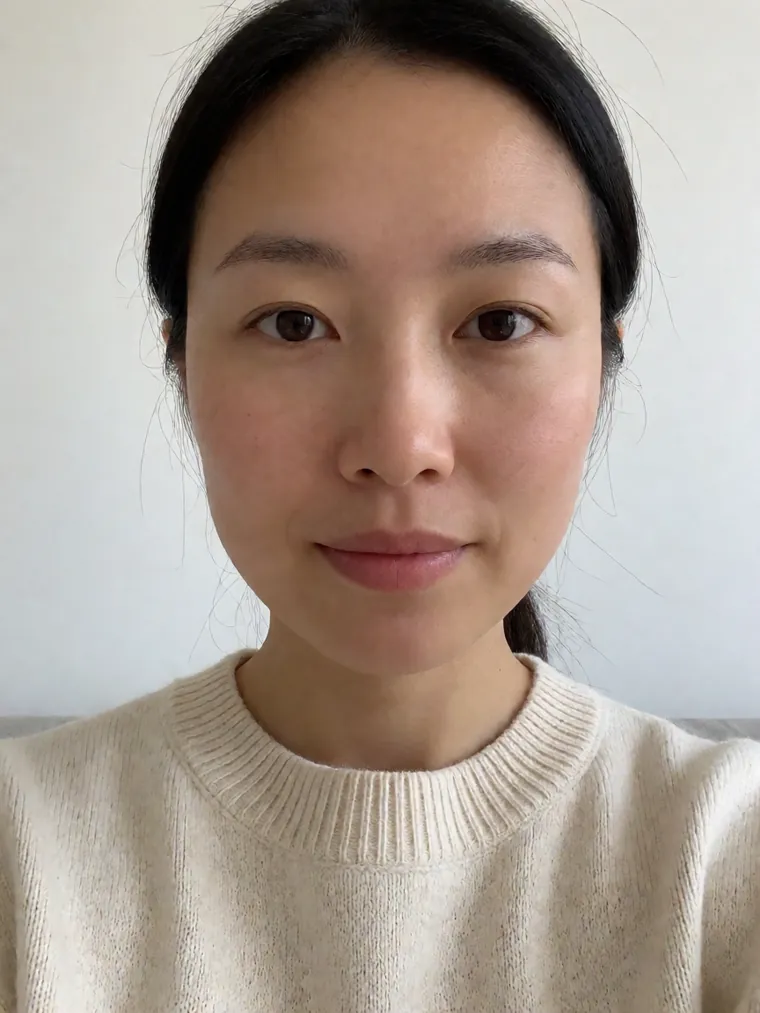
No beauty filters, no skin smoothing, no whitening. Photos modified with a filter are rejected in the US, UK and Canada.
Check before you upload
- Eyes open, sharp and clearly visible
- Eyebrows and ears not covered by hair
- No glasses, sunglasses, hat or headwear (religious headwear is allowed if the face is unobstructed)
- Plain background, no shadows or objects
- Even lighting — no dark patches on the face
- Plain dark clothing; avoid white if you want a white background
- The original photo file — not a photo of a printed photo
If you can't get someone to help, prop the phone against something at eye level, use the rear camera with a 3-second timer, and take several shots.
Create my ID photo